According to a study by W3Techs, over 11.0% of all existing websites use Facebook Pixel to analyse and track their audience. This number continues to rise and for good reason.
Facebook Pixel is a powerful tool that helps you grow your business and increase conversion rates. It also has other benefits, such as expanding your business to new audiences, targeting similar users and measuring the results of your current adverts.
It’s also pretty easy to install and use, especially if you have a WordPress website. Read on to learn how to set up Facebook Pixel on WordPress, taking into account data laws like the GDPR and CCPA.
What is Facebook Pixel?
The Facebook Pixel (or Meta Pixel) is a snippet of code that you can install on your website to measure the effectiveness of your advertising campaigns. It tracks the actions that users take on your website and allows you to optimise your ads so that you can direct them to specific actions.
Facebook Pixel is Meta’s official analytics tool and can be compared to Google Analytics. In fact, according to a survey by W3Techs, Facebook Pixel was voted one of the best tools for traffic analysis in 2021, second only to Google Analytics.
Using Facebook Pixel on your WordPress website can help to increase your online reach. But there are many other benefits. Let’s explore them.
Advantages of using Facebook Pixel
Helps to select the right target group
Instead of wasting your marketing budget on a generic or undefined audience, Facebook Pixel helps you identify your ideal audience. This is done by tracking users who have visited a specific page on your website and performed a specific action.
Using this data, you can tailor adverts to target the people most likely to respond to your call to action.
Offers cross-device advertising
Which devices are used by most of your users? Facebook Pixel can measure performance across devices and provide insight into how and where your campaigns perform best. This allows you to optimise your ads to target audiences on a specific device or web browser.
Aimed at similar target groups
What happens when you find potential customers who have identical or similar characteristics to your current users? Facebook Pixel can help you identify similar target groups and target your marketing to them.
Promotes sales
You can use Facebook Pixel to set up an automatic ad bid that targets users who are most likely to make purchases, sign up for notifications, and respond to calls to action.
With this in mind, you will likely be able to increase the number of sales of products and services they are already making.
Measures display results
You can also use Facebook Pixel to test the effectiveness of your adverts and determine whether they are working as intended. Are your users clicking through links to your website? Are they performing any of your desired actions? With the ad results measured, you can make calculated changes to improve performance.
Subscribe to the Raidboxes newsletter!
We share the latest WordPress insights, business tips, and more with you once a month.
How to create a Facebook Pixel
Now that you know what Facebook Pixel is and how it can help you grow your online business, how do you create it?
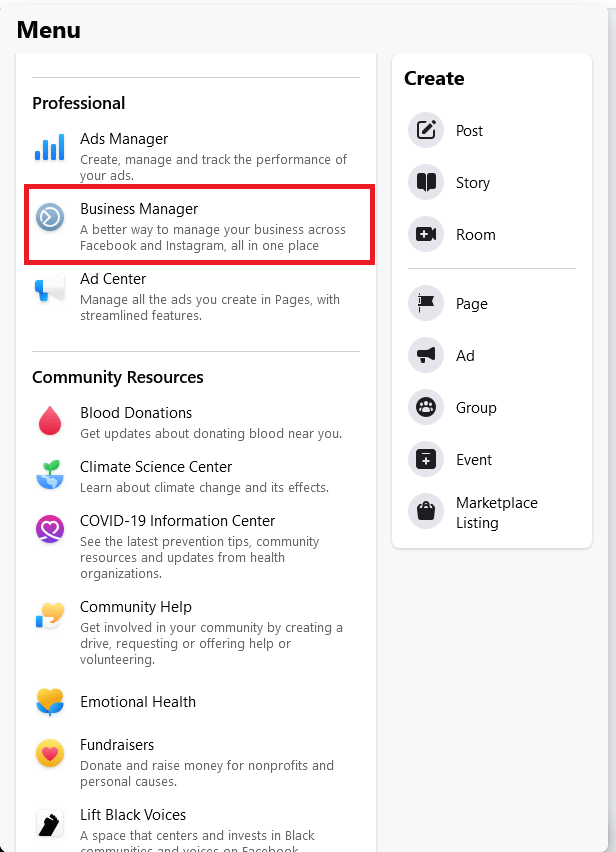
Firstly, click on the menu button on the Facebook homepage and scroll down to the Professional section and select Business Manager.
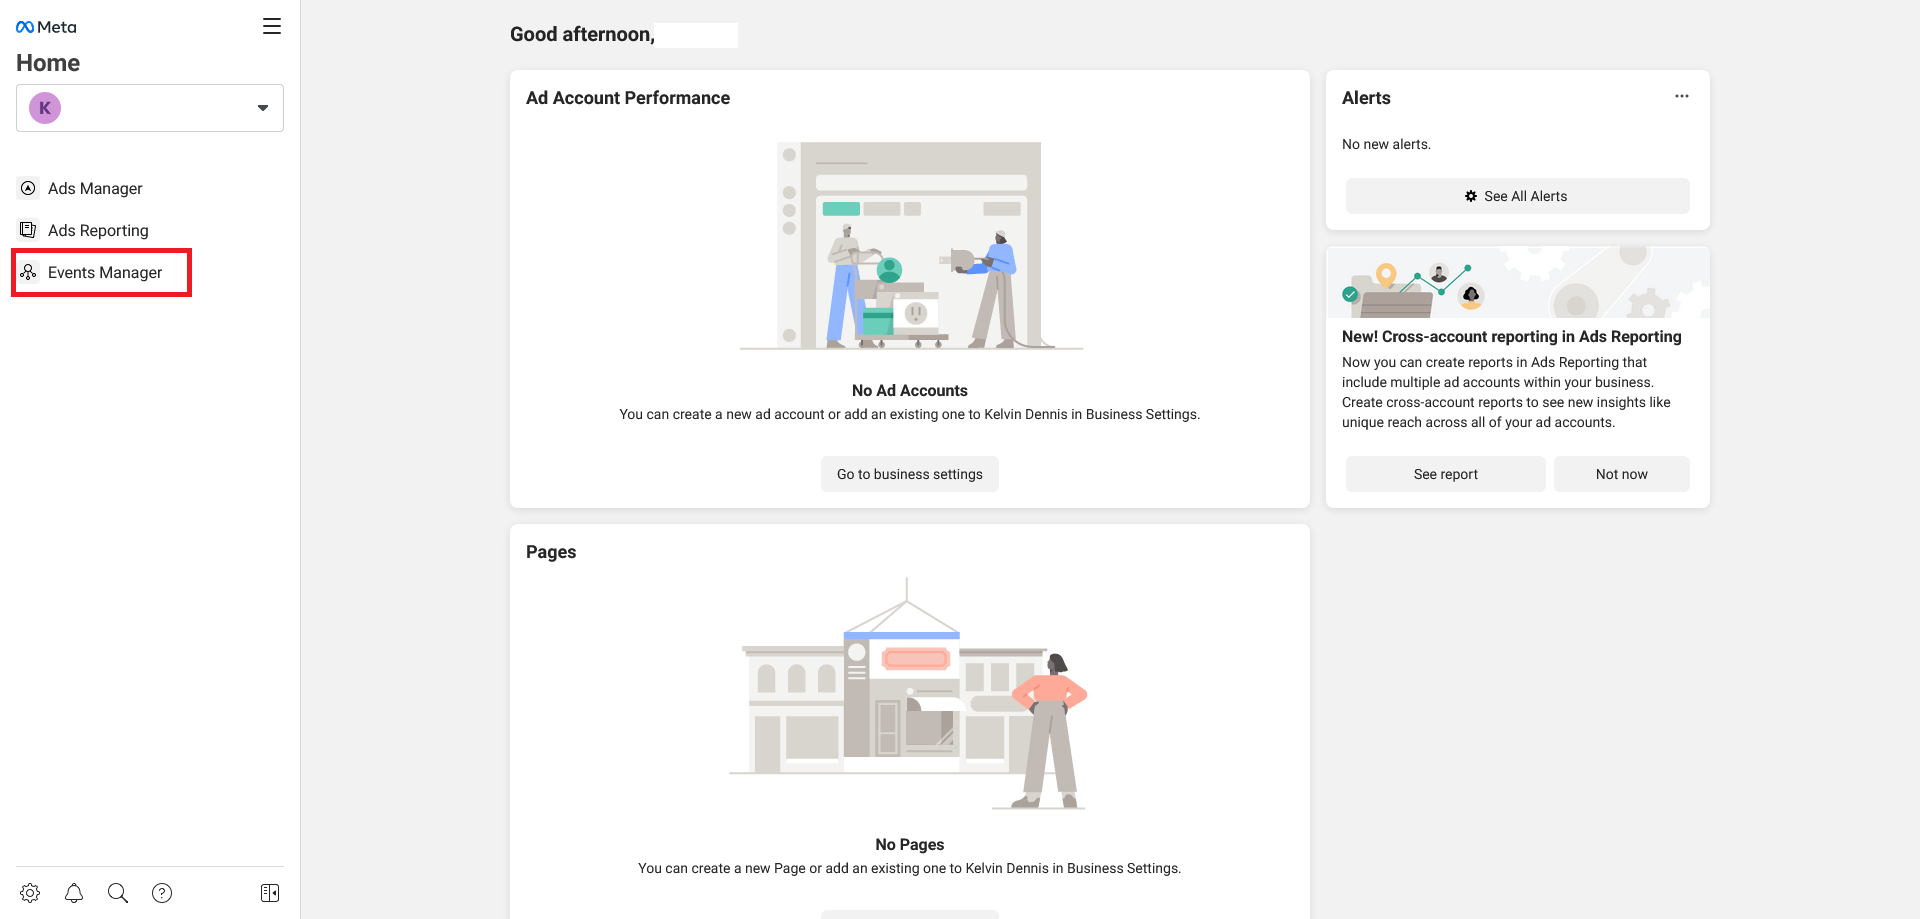
This setting opens the Business Manager page from which you will create your Facebook Pixel. Now click on Event Manager.
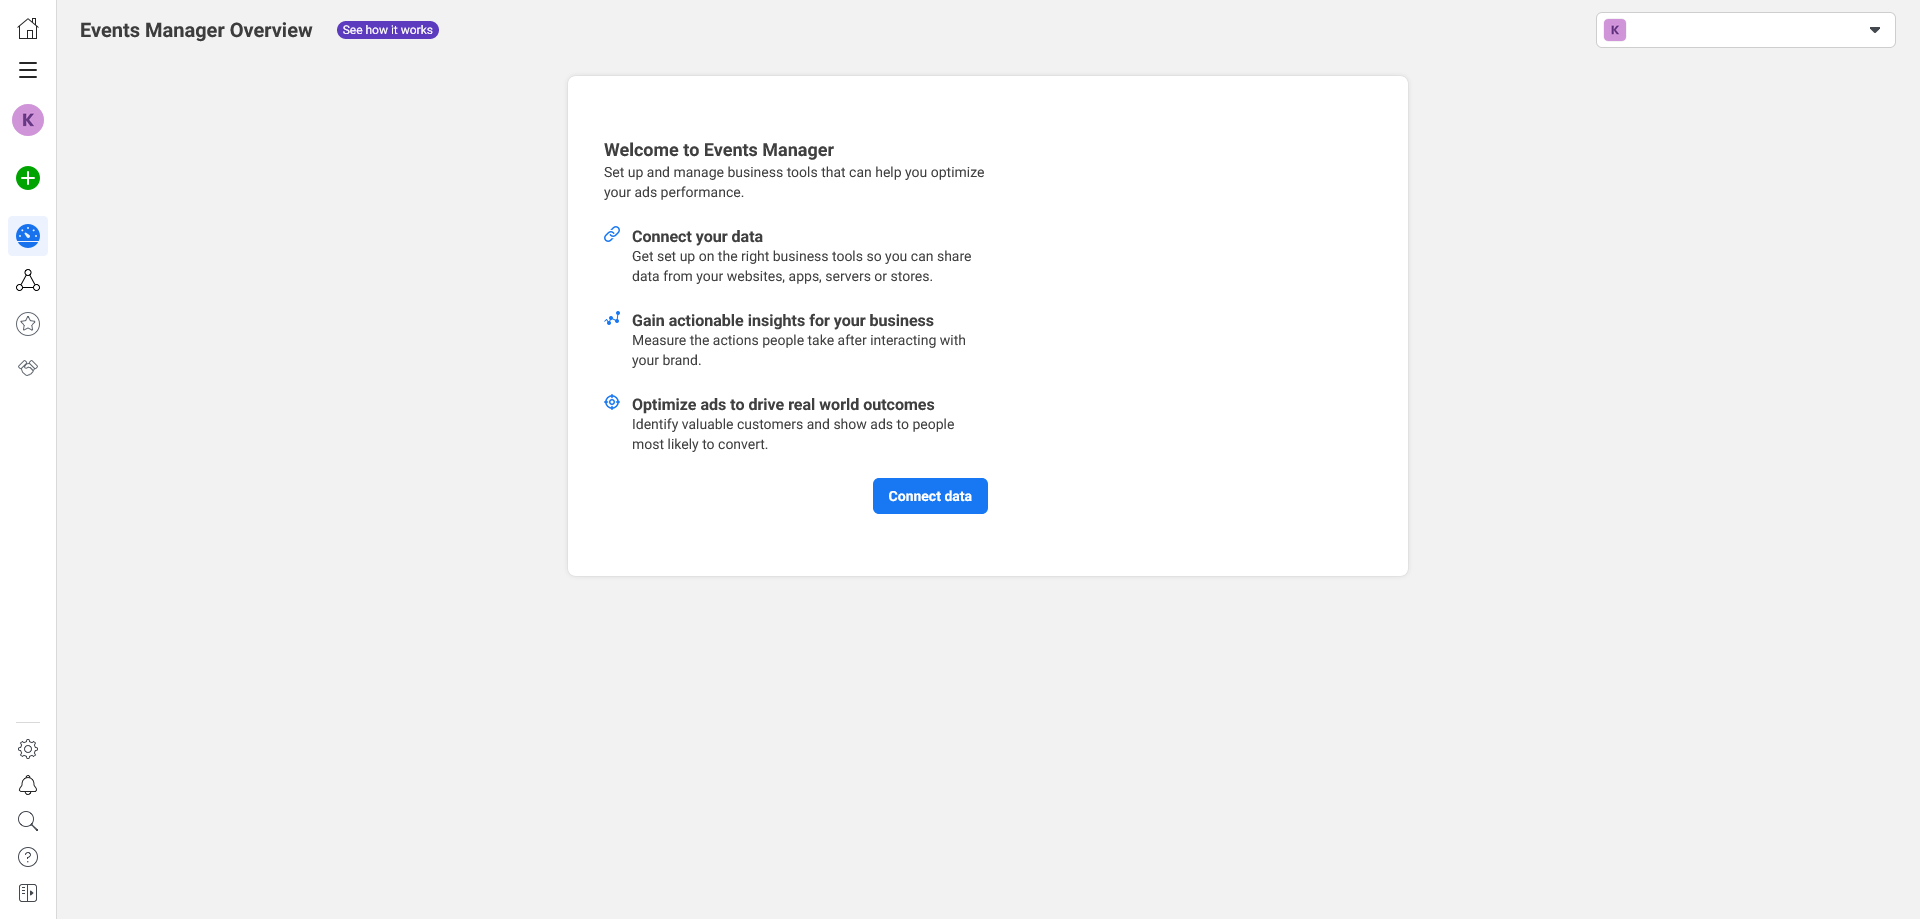
Click on the Connect data button on the Event manager page. This allows you to select and create a pixel for your account.
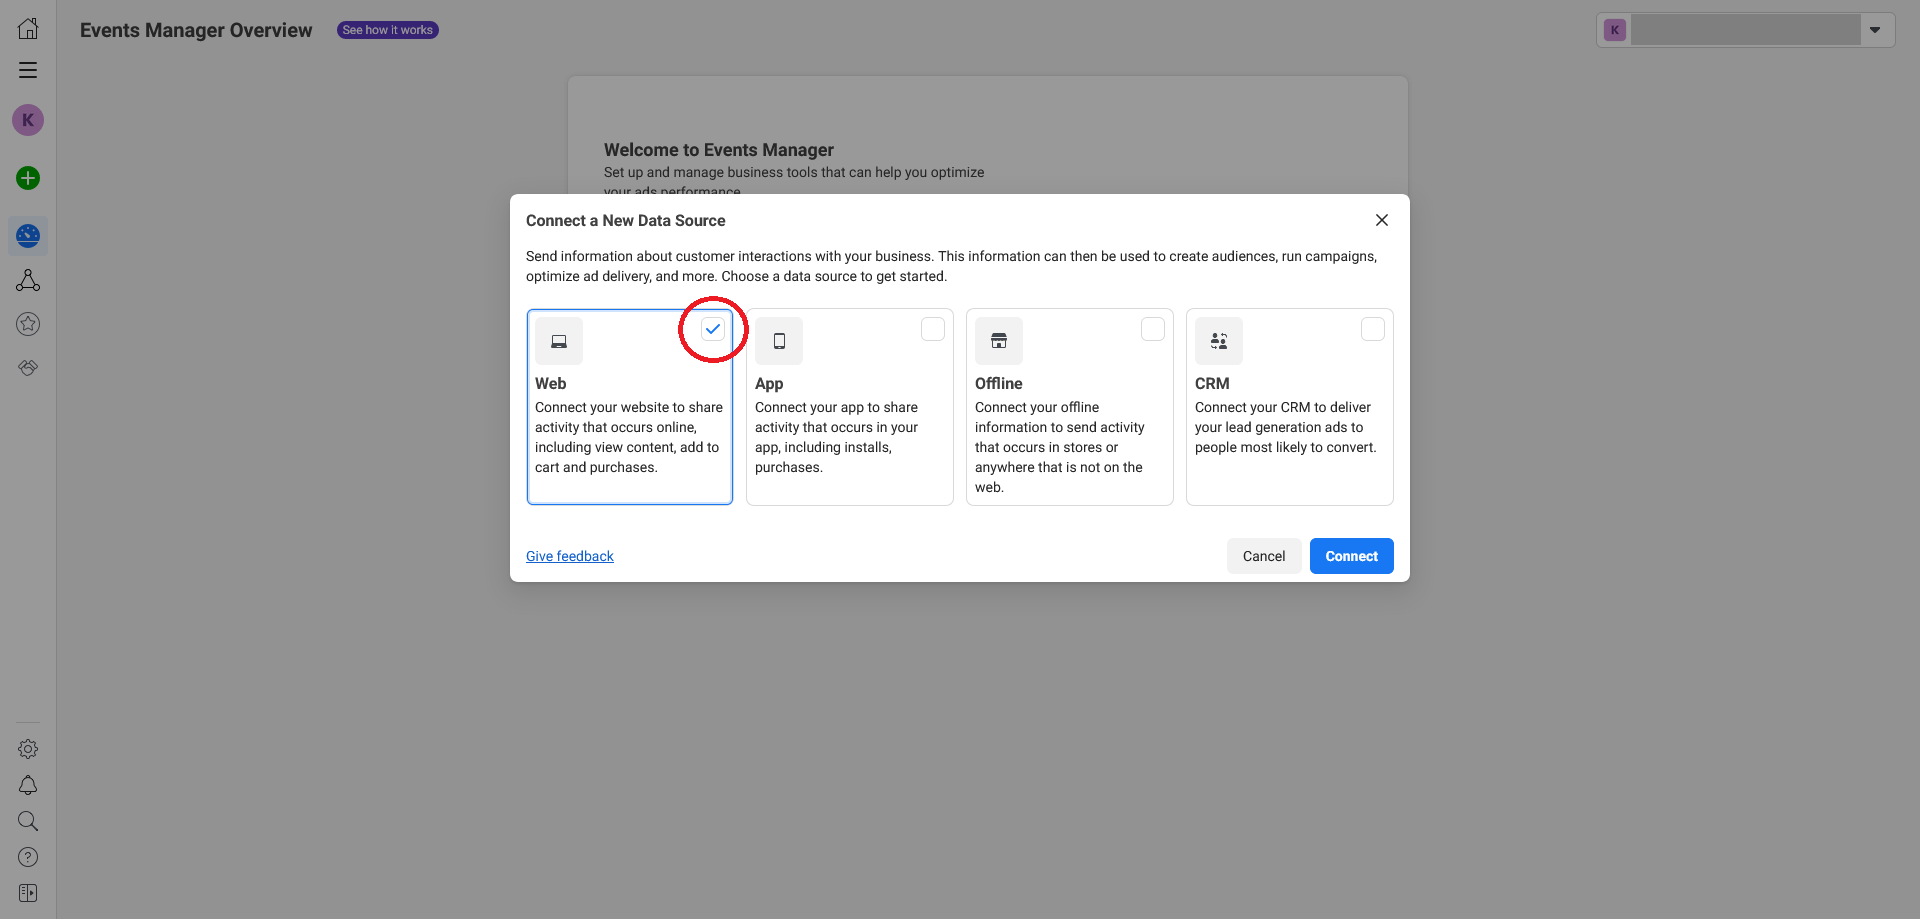
From there, you need to select a data source . You can choose between Web, Apps, Offline or via a CRM. Since you are creating a pixel for your WordPress website, select Web and then click the Connect button.
In the window you will be asked to name your pixel.
Now you can connect your website directly to the Business Manager. To do this, enter the domain name in the dialogue box and then click on Check. If you don’t want to connect your website yet, tick the I don’t have a website box.
Next, you can choose whether you want to use Facebook’s Conversion API together with your Facebook pixel or just the pixel. In this case, select Meta Pixel only.
There you go! You’ve just created your first Facebook Pixel.
Note: Meta (Facebook) has changed its Business Manager so that you can no longer delete a pixel once it has been created.
How to add a Facebook Pixel to WordPress
There are two ways to add a Facebook Pixel to your WordPress website. You can add a code snippet directly to your website or use a WordPress plugin.
Adding a Facebook pixel to WordPress with code snippet
Firstly, you need to generate a code from your pixel to add it to your website. To do this, click on the Continue pixel setup button.
Select the Meta Pixel option in the Set up web events pop-up window and click on the Connect button.
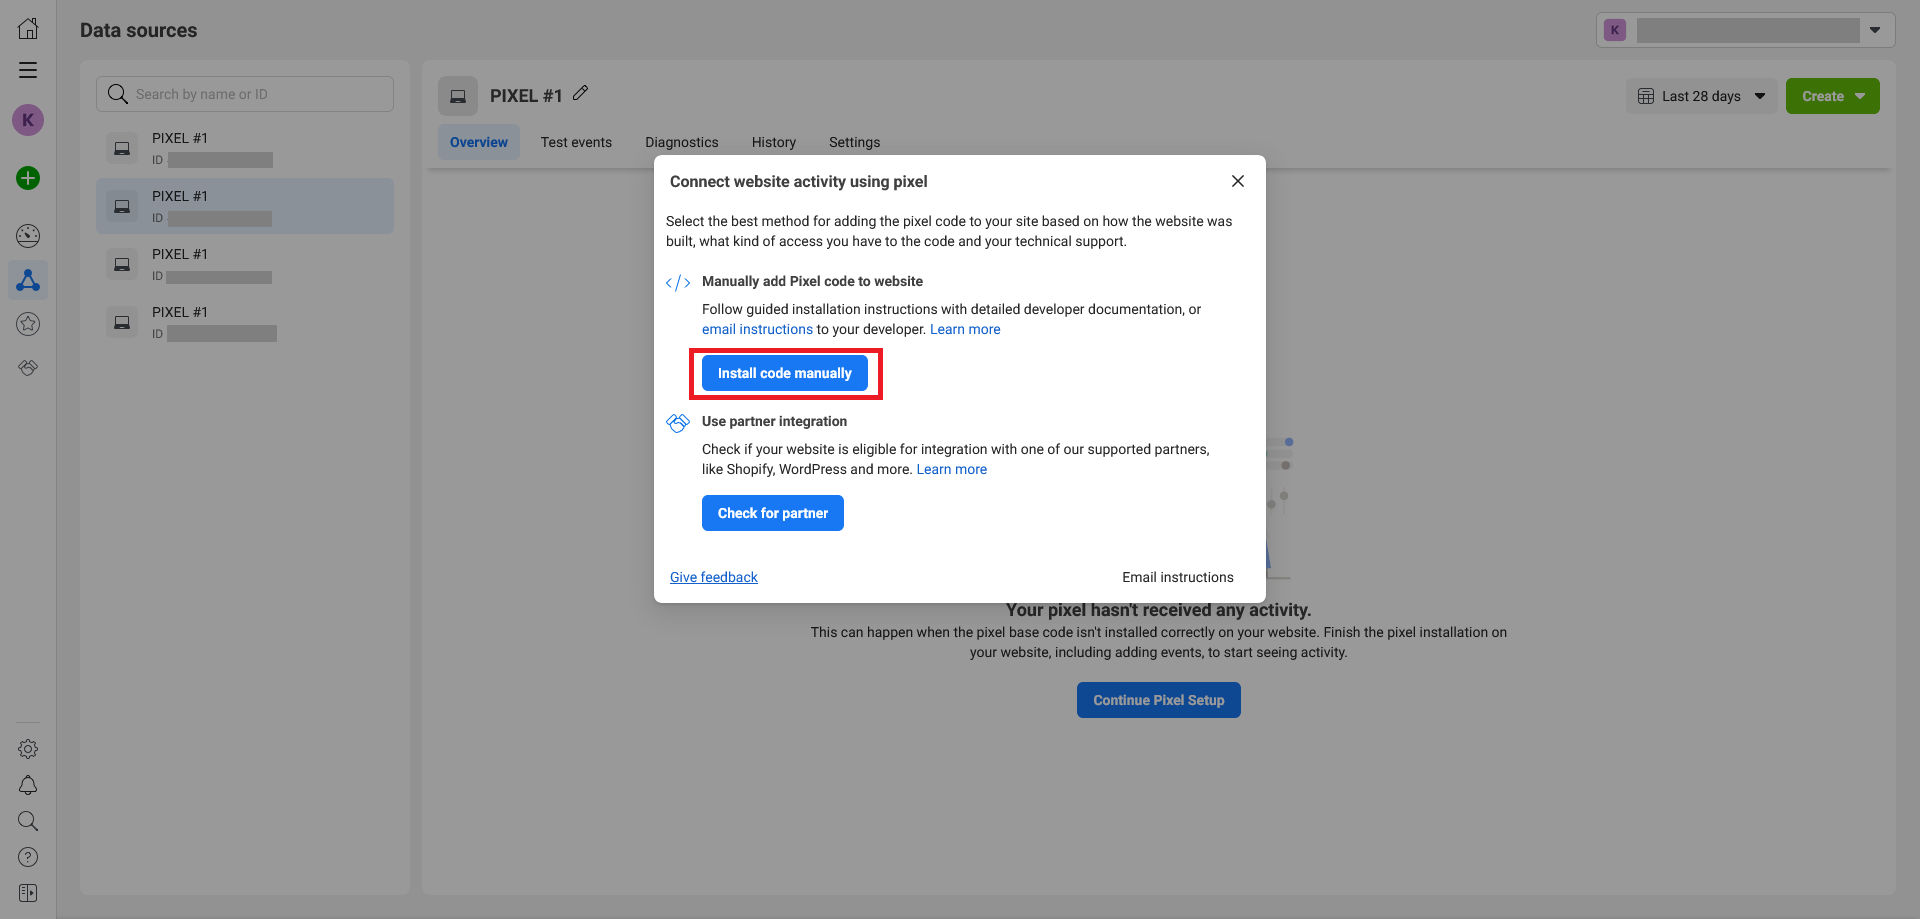
In the new pop-up window Connect website activity with pixel , select the option Install code manually.
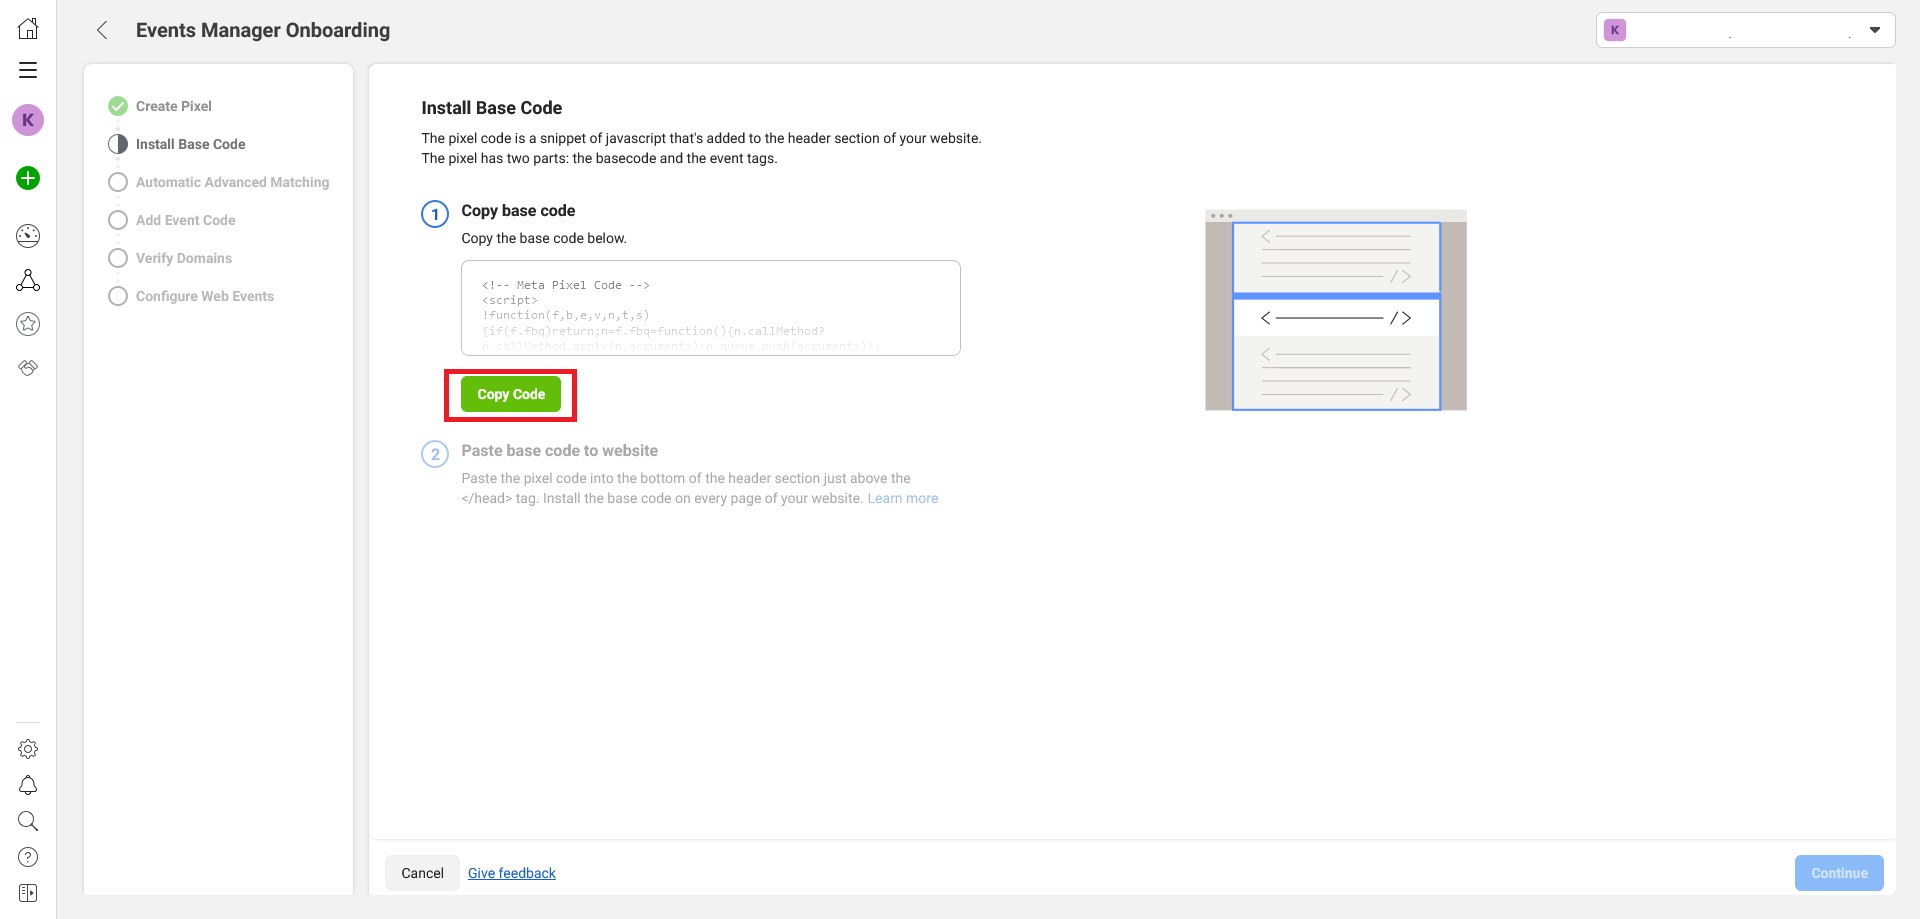
The introductory page of the event manager will then open. Click on the Copy code button under Install base code.
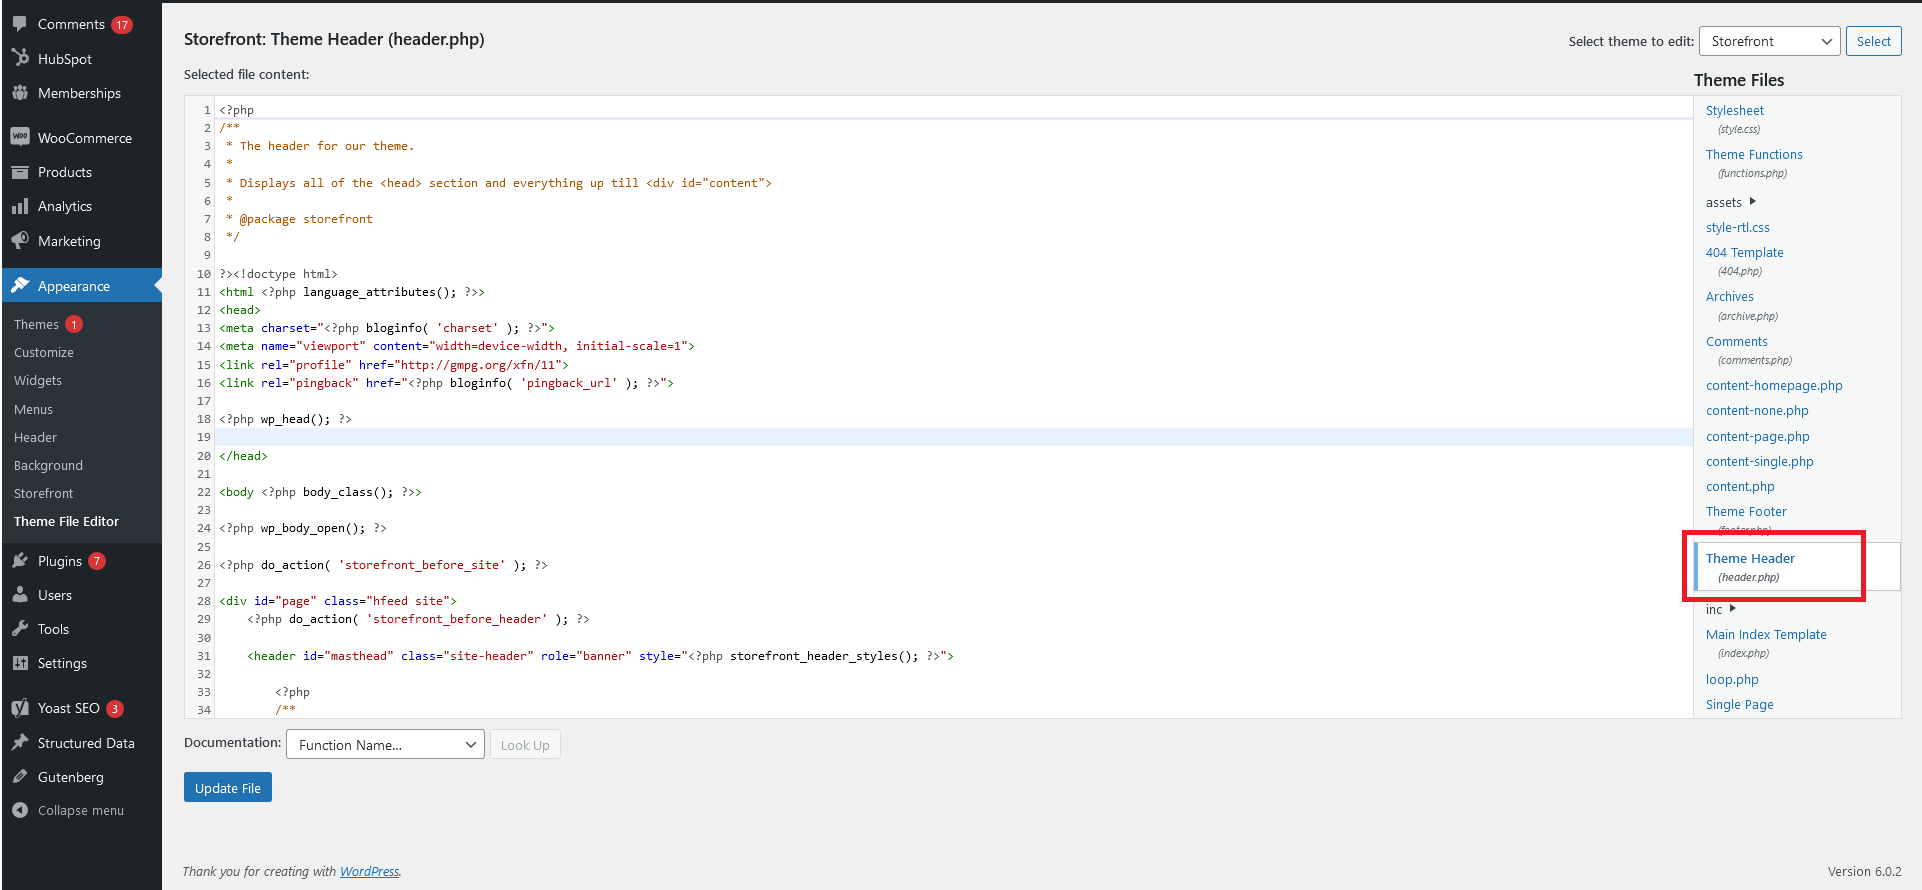
With the code in hand, go to your website and log in to your WordPress dashboard. In the left sidebar, select Appearance and then Editor for theme files.

On the Edit Theme page, scroll down and select the header.php page on the Theme Files tab on the right-hand side.
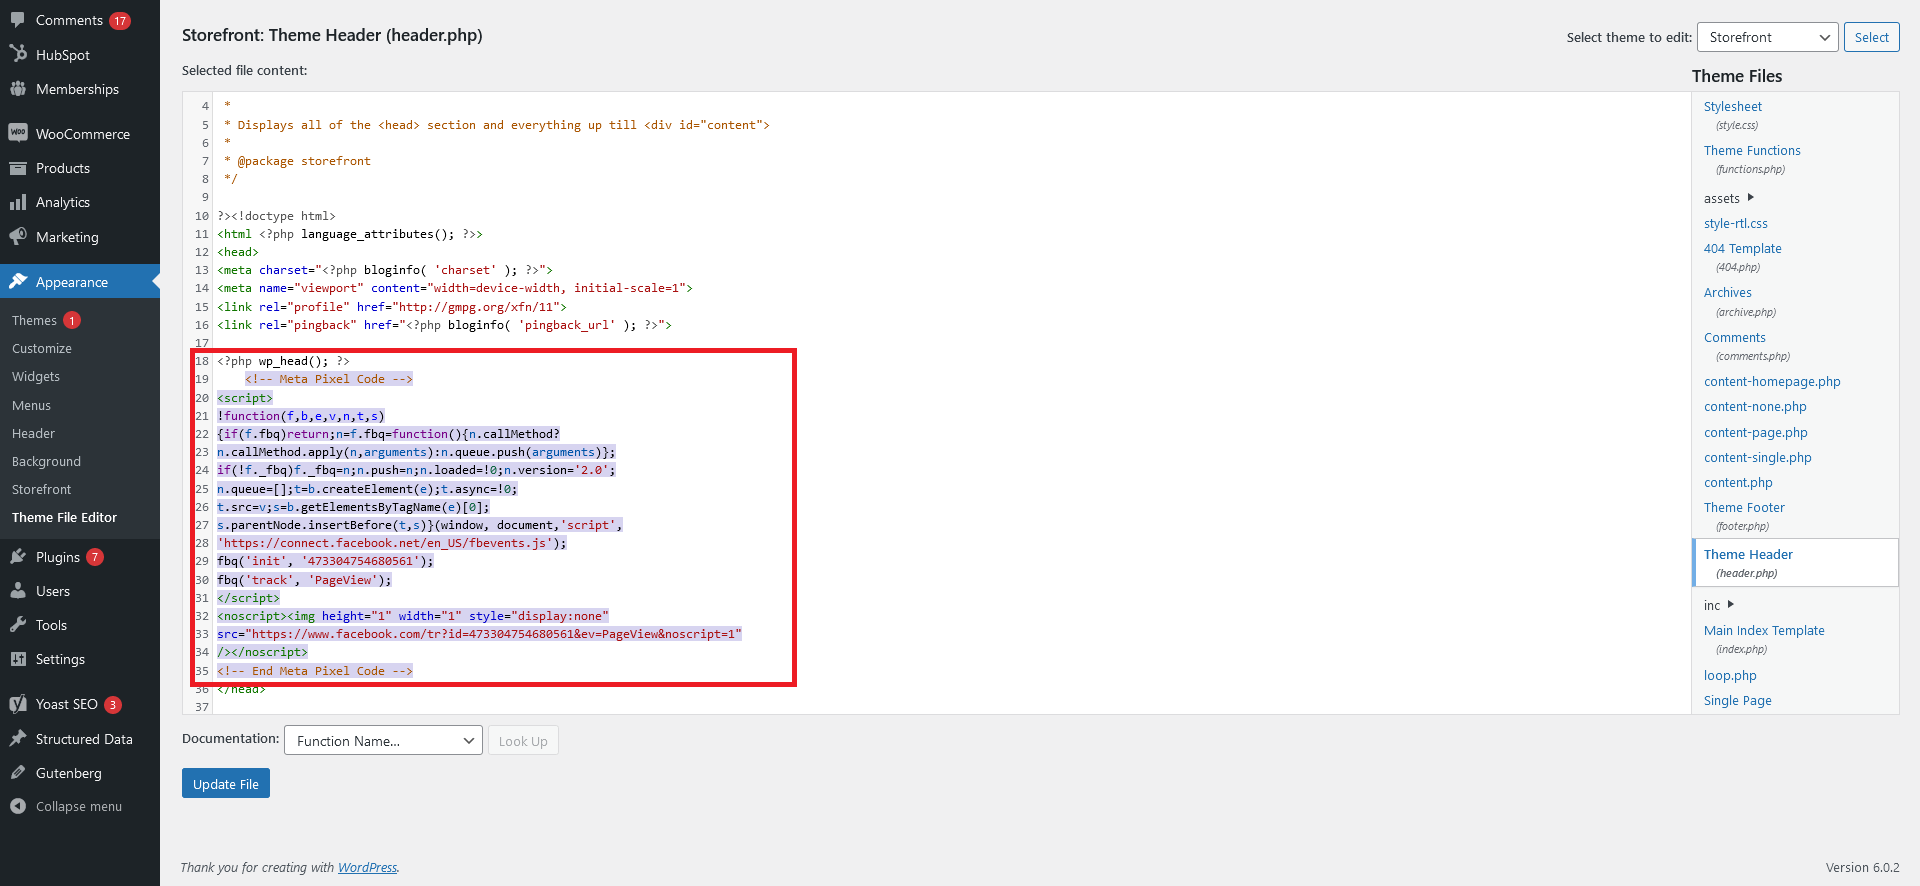
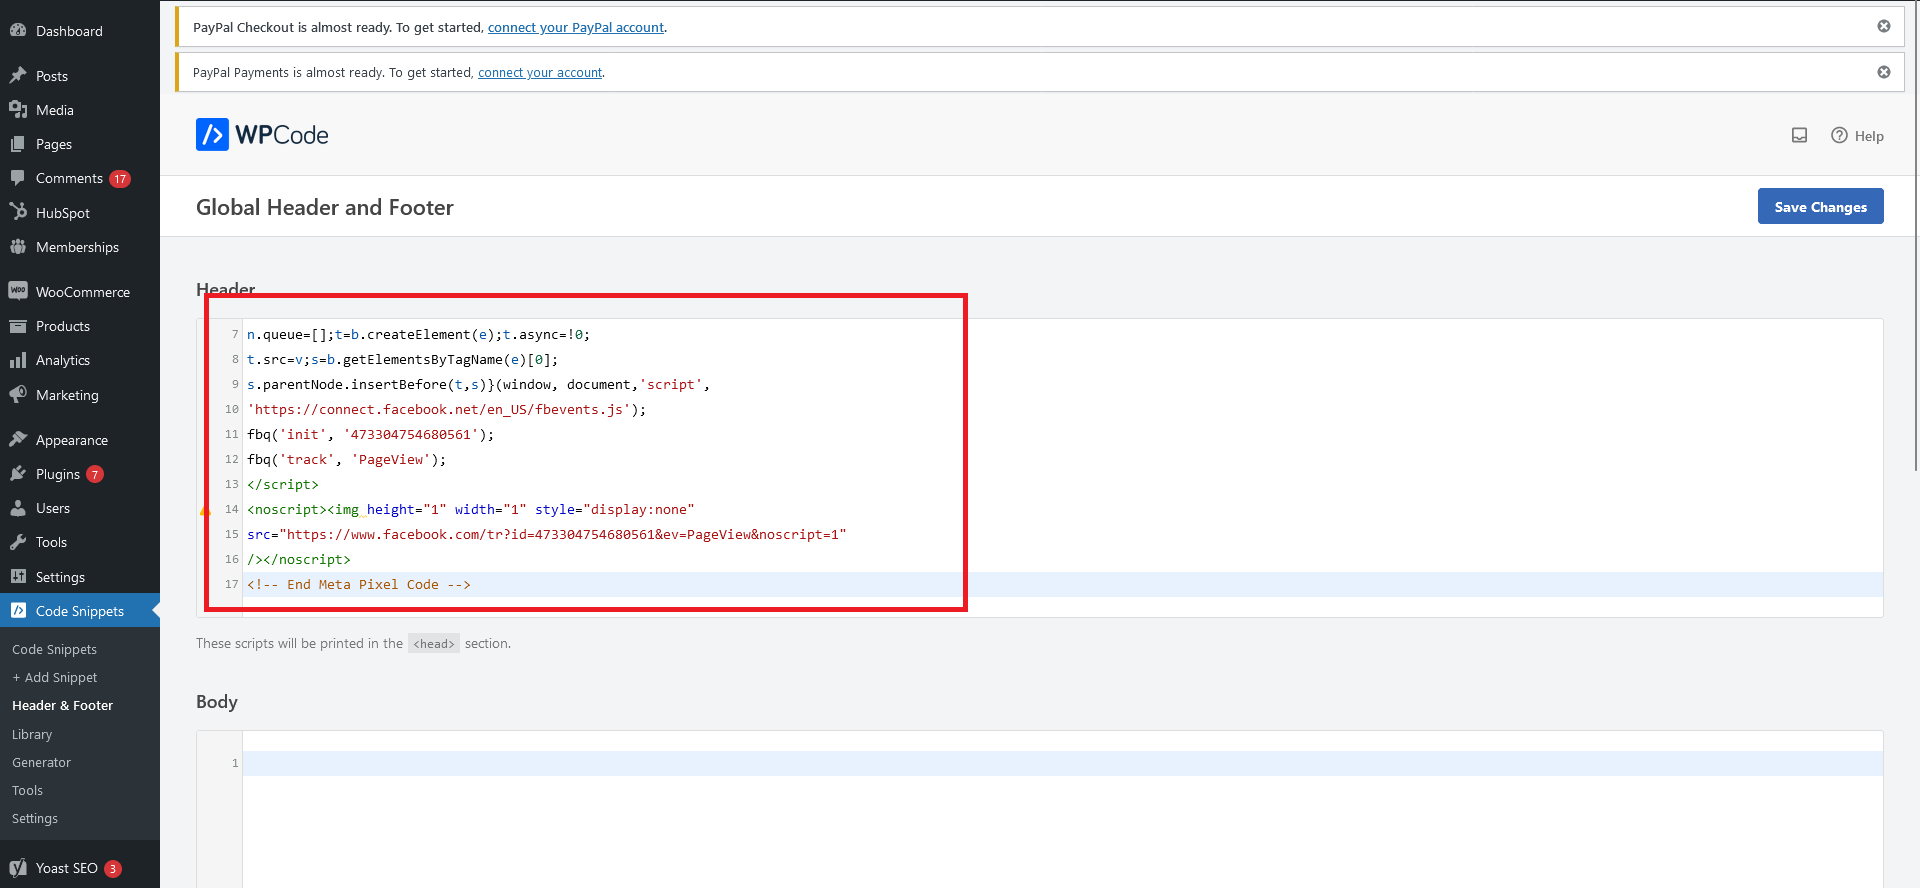
Now insert the pixel code between the opening and closing head tag.
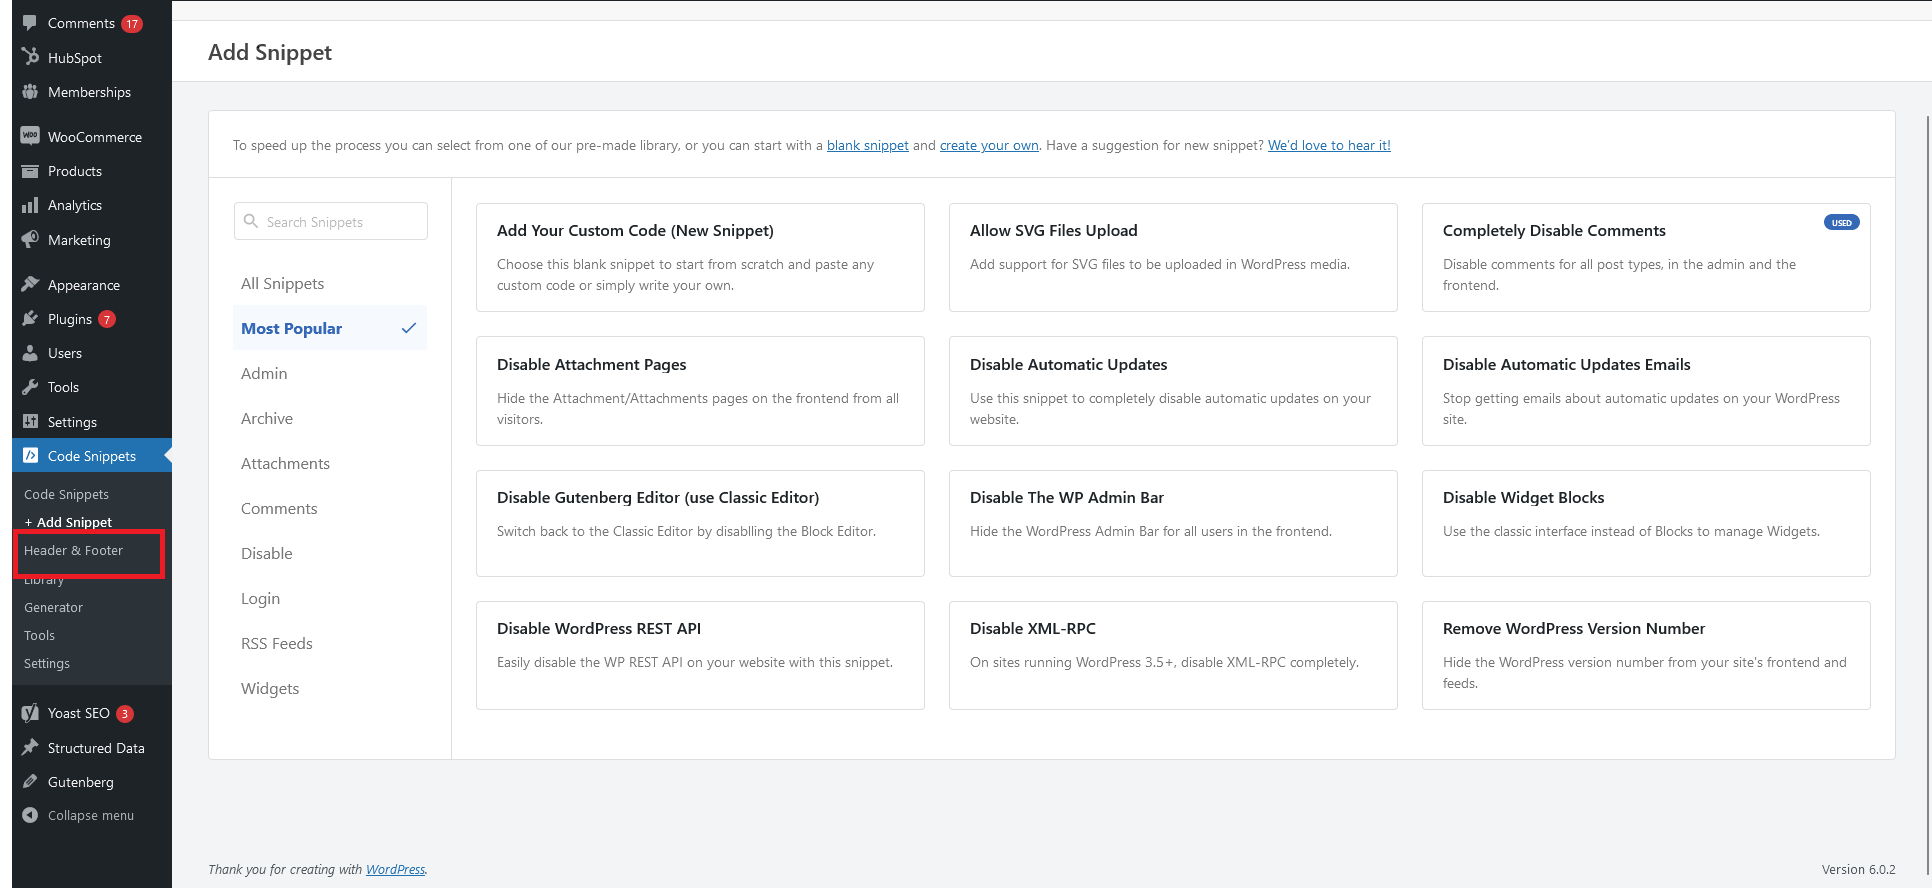
Alternatively, you can install the WPCode plugin to add your Facebook pixel with code.
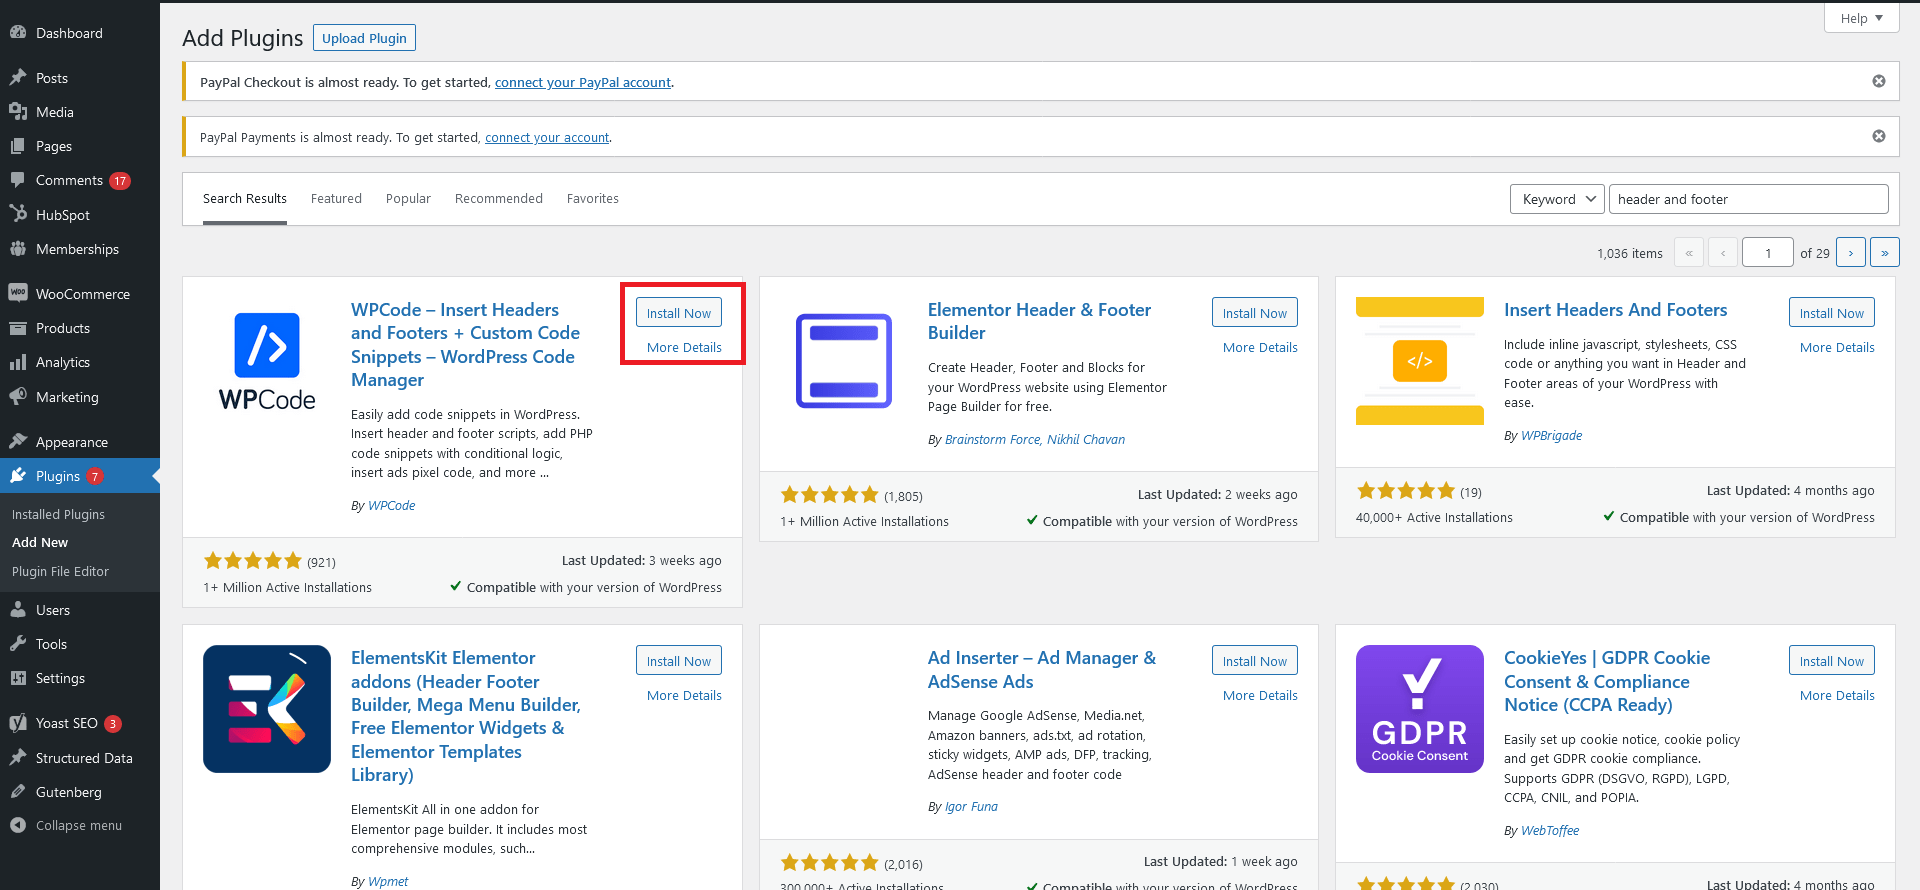
Once you have installed and activated the plugin, select the Header and footer option.
Paste the code of the pixel into the header field and save your changes.
Adding a Facebook pixel to WordPress with no-code plugins
You can add your Facebook Pixel to your WordPress website using WordPress plugins – no code required. Here are some excellent options to get you started:
Facebook for WooCommerce
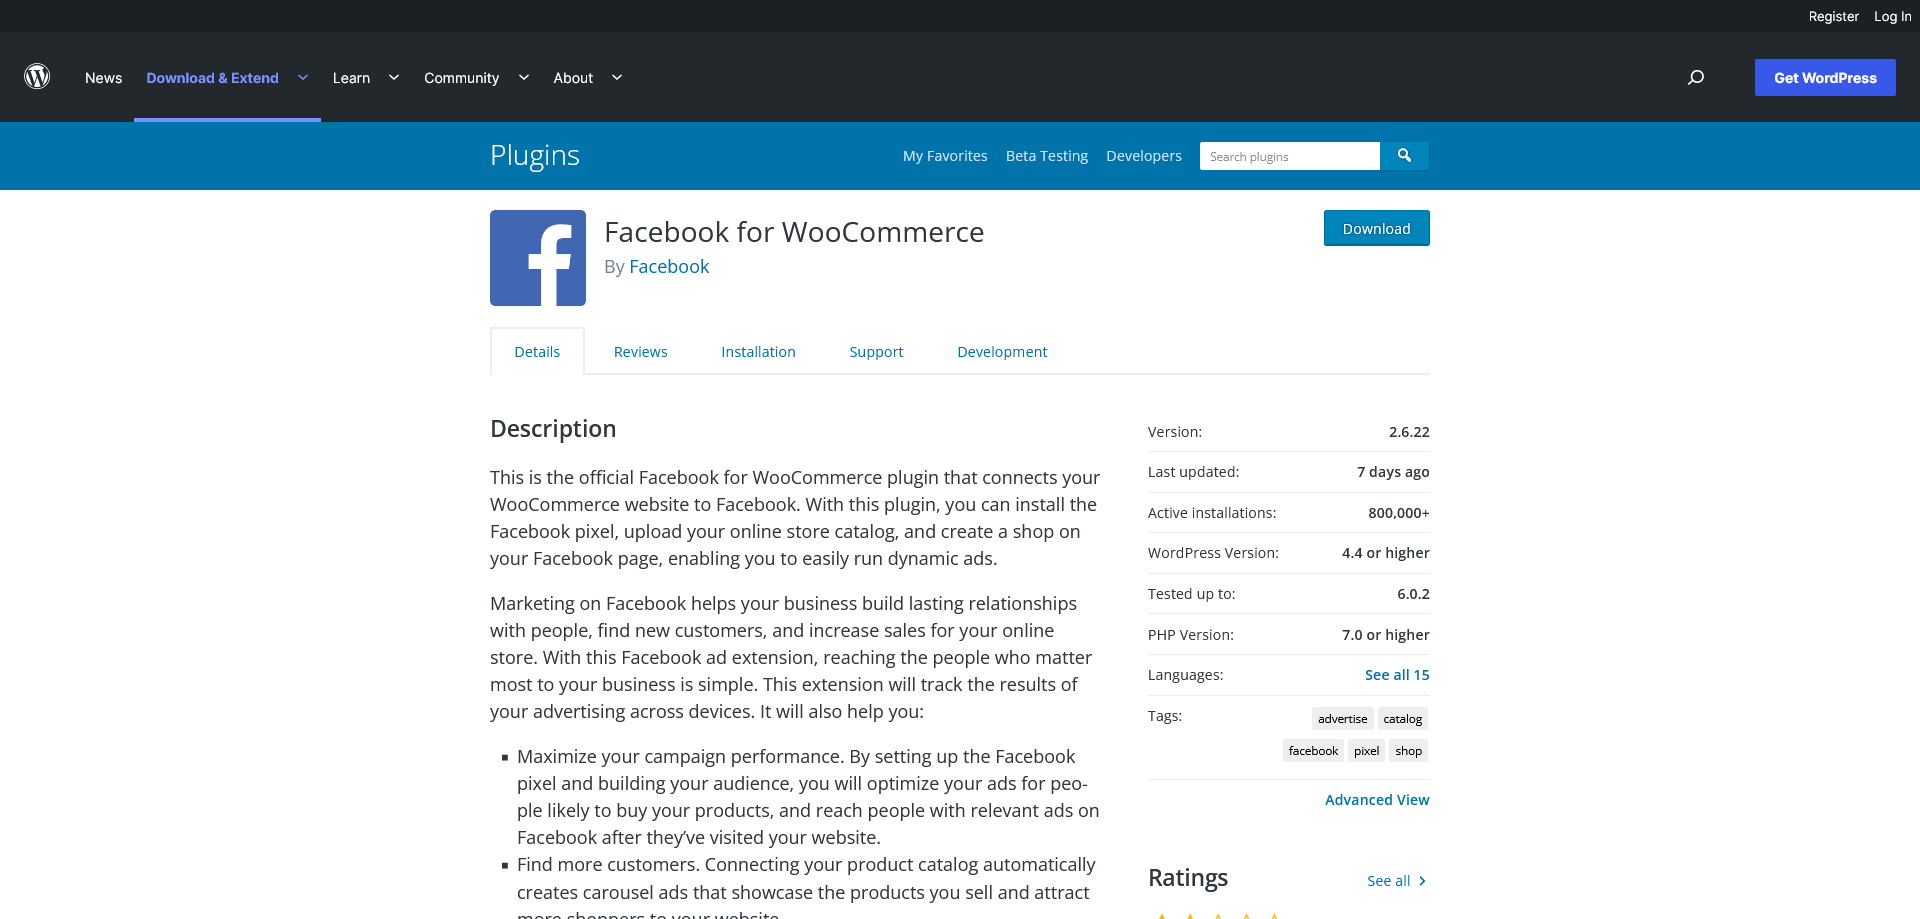
This free official Facebook Pixel plugin allows you to add a Facebook Pixel to your WordPress-based e-commerce shop. But it can do more than that. You can use this plugin to:
- create a product shop for your company on your Facebook page
- upload your product catalogue to your Facebook shop
- place different types of adverts for your business on Facebook and other social media platforms
As soon as you have installed the WooCommerce plugin in your WordPress backend, connect your Facebook account. The plugin automatically recognises your Facebook page and selects a pixel that you can use. You can also change the pixel or the business page.
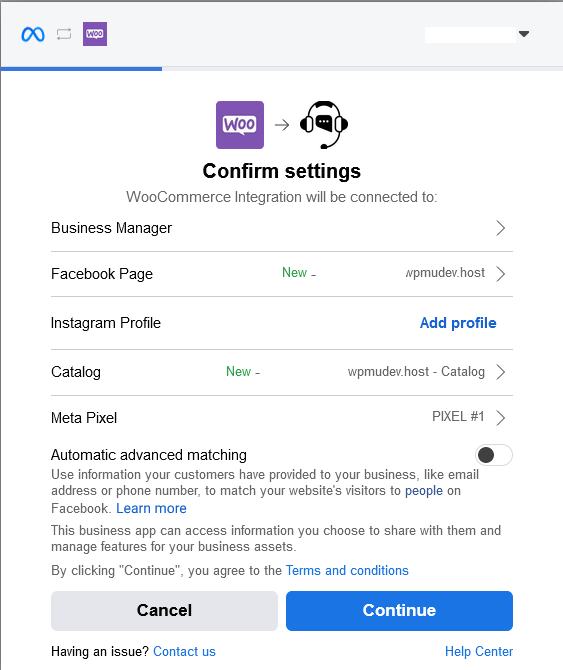
Facebook for WooCommerce automatically configures the Facebook Conversion API for you and optimises your ads through automatic advanced matching. You can activate this setting when setting up the plugin or afterwards.
PixelYourSite
PixelYourSite is another free plugin that allows you to add Facebook Pixel to your WordPress website. In addition, you can also add Facebook Conversion API, Google Analytics and Pinterest Tag Tracking with this plugin. It also has features that allow you to insert a new and custom code in the header or footer sections.
Compatibility with WooCommerce is also a given with PixelYourSite.
With this tool, you can create and track automated events. These are the actions that your customers perform on your website. These include
- Filling out forms
- Search
- Downloads
You can create and track customised conversion events with PixelYourSite even without code knowledge.
Pixel cat
Pixel Cat, formerly known as the “Facebook Conversion Pixel” addon, is another option. Once you have installed it on your WordPress website, you can track events and perform important functions such as retargeting and conversion tracking.
Pixel Cat makes it possible for you:
- Create standard events with a point-and-click builder to track conversions and optimise ads for custom audiences.
- Segment your visitors based on certain actions, such as pages visited or products purchased.
- Customise the pixel parameters, including price and currency, so you can easily track the ROI on your ad spend.
- Exclude bouncing visitors by only tracking those who have spent a certain amount of time on your website
- Carry out remarketing and retargeting campaigns
Pixel Cat is a zero code plugin that is also suitable for beginners.
WooCommerce Hosting
With WooCommerce hosting, you can launch your own online store quickly and securely and manage it professionally – without any technical hurdles. Check our Raidboxes WooCommerce Hosting now.
How to test whether Facebook Pixel works on your website
Once you have installed the Facebook Pixel on your WordPress website, you should check that it is working. This step is important because if your pixel is not working, events cannot be tracked, ads cannot be optimised and your conversions cannot be increased.
For this step, you will need to download the Facebook Pixel Helper Chrome extension and install it in your browser. Unfortunately, this plugin is not available for other browsers, but it should work for Chrome-based browsers such as Microsoft Edge and Google Chrome.
Once you have installed the plugin, visit your website with the Chrome browser and click on it. If the installation was successful, your pixel will be triggered and you should see a notification like the one above. If not, you’ll see something like the image below.
That’s it! You have successfully installed the Facebook Pixel code on your WordPress website. If you have any problems, you can reconfigure the pixel at any time using one of the methods mentioned above.
GDPR, CCPA and data protection
Let’s first clarify what the acronyms stand for:
- The General Data Protection Regulation (GDPR) is a European law that regulates how companies use, share and protect the privacy and personal data of all EU residents in transactions within EU member states.
- The California Consumer Privacy Act (CCPA) is an American law in California that gives consumers control over all personal data that companies are allowed to collect and use.
Both are laws that give consumers the right to be informed, unsubscribe and delete any personal data your company has collected from them. You are also required to inform consumers about privacy practices and the data you collect.
If you use Facebook Pixel on your website, you are legally obliged to comply with these laws.
Here are five tips you should follow to protect your customers’ data and comply with regulations.
1. update your privacy policy.
If you have users in the EU or California, update your privacy policy and make it GDPR and CCPA compliant. Be as transparent as possible with your audience. Make sure they know what data you collect and use. Let them know that you use Facebook Pixel and other tools.
2. get the consent of your customers to use the Facebook pixel
When creating custom audiences, make sure you have the explicit permission of your users to address them. Most of them will grant you access and you can address them directly.
3. if someone withdraws their consent, remove them from the list.
If users change or withdraw their consent, respect their decision and remove them from your list. In this way, you protect your company from legal risks and at the same time enable your customers to come back at any time.
4. use GDPR and CCPA compliant tools.
If you collect data from your users, make sure that you use tools that comply with these regulations. Make sure that you can edit and delete customer data in a verifiable way.
5. use a cookie notification bar.
Make sure that a message appears prominently on your website asking your users for their consent to use cookies. This will give you permission to track their activity on your website.
Conclusion – Adding Facebook Pixel to WordPress
You can create your pixel using the instructions above and add it to your WordPress website. It’s a straightforward process and takes no more than five minutes.
Depending on your preference, you can use the manual script in the header or a plugin. The most important thing is that your pixel is working. The Facebook Pixel Helper extension helps you to determine this.
Remember that your Facebook Pixel collects and tracks data. So make sure you comply with GDPR and CCPA laws where applicable. This will make you and your customers happy.
Speaking of happy customers: If you’re looking for a robust website hosting service for your business or agency, you should check out Raidboxes’ managed WordPress hosting.
Your questions and answers about using Facebook Pixel
Do you have any further comments on the use of Facebook Pixel? Share them with us in the comments below and let’s talk about them. For more insights on WordPress, web design or online business, follow Raidboxes on Facebook or LinkedIn – or subscribe to our newsletter.
Leave a Reply