
Would you like to create your own WordPress website, but don’t know where to start? Then you’ve come to the right place. In this article, we’ll show you how to create your own website with WordPress in eight steps – from the domain and design to data protection and more. It doesn’t have to be complicated or time-consuming to create your own website.
The instructions are structured in such a way that even beginners without programming knowledge can get started straight away. We also reveal one or two professional tips.
What is WordPress?
WordPress is an open source software and the world’s most popular content management system (CMS) with a market share of almost 64 per cent. WordPress can be used to create all types of websites – whether blogs, company websites, online shops or personal portfolio sites.
A CMS consists of a backend and a frontend: In the backend, you can enter, manage and change the content of your website as an admin (or user with the appropriate access rights). All changes you make are visible in the frontend – i.e. on the actual website that is displayed in your visitors’ browsers.
WordPress is particularly popular because it offers an incredible number of themes (templates), plugins and page builders to help you create your WordPress website.
Reading tip
If you want to start your own blog and are looking for tips, read our article Create a WordPress blog: in 7 steps to your goal.
This means that WordPress can be used to create professional websites relatively quickly and easily in a modular system, even without in-depth programming knowledge.
New: Raidboxes AI Site Assistant
With the new Raidboxes AI Site Assistant, you can create your website in just a few steps – without any technical stress. Whether it’s a business website, store or portfolio: You enter your prompt and the AI delivers the design, structure and content. Test the new AI Site Assistant now!

How can you create your own WordPress website?
To create your own website with WordPress, you first need two things:
- A domain (e.g. www.meinbusinessistsuper.de)
- Web hosting (i.e. a server on which your website is stored and accessible)
Once you have found a domain name and the hosting provider you trust (more on this in a moment), install WordPress on their server (this usually takes just a few clicks) and then create your website.
Here you will find an overview of the individual steps that you normally go through, which we will look at in more detail below:
- Find domain
- Choose hosting provider
- Install WordPress
- Define structure and navigation
- WordPress website design
- Install plugins
- Create pages and content
- Imprint, data protection & Co. supplement
Managed WordPress hosting providers such as Raidboxes help you by allowing you to create a new WordPress website with just a few clicks. Then you don’t have to worry about manual installation. This saves a lot of time, see our article Advantages of WordPress managed hosting.
Step 1: Find domain
The path to your own WordPress website starts with the right name. More precisely, with a domain. Because your website needs an address under which it can be accessed on the internet. There are a few things you should bear in mind when choosing your domain name:
- Choose a name that is rather short and easy to remember. For example, if you are creating a website for a company, the company name is usually a good choice as a domain name.
- Make sure that your domain has the right ending. For local services, you can choose the ending of your country with a clear conscience (for Germany this would be .de). If you operate internationally, .com might be a better choice.
- Make sure that your domain name does not contain any protected brand names. Otherwise you may be warned relatively quickly.
Step 2: Choose hosting provider
Once you have decided at which address your WordPress website should be accessible, the next step is hosting. This means that your website has to “live” somewhere. The web space you need for this is best purchased from a professional hosting provider.
There are now many providers who advertise themselves as “WordPress hosting” and offer particularly low prices. However, not all of them actually offer professional WordPress hosting.
How to find the right provider
Because every website project has different requirements, it is difficult to make a general recommendation regarding hosting. However, we have put together some tips and questions that can help you find the right WordPress hosting. First of all, you should be clear about what exactly you are looking for.
Questions that you should answer for yourself include
- How much support and service do you need? What can you do yourself (including technically) and where do you need the help of professionals?
- How much budget can and would you like to set aside for hosting?
- How much will your website grow over time? When will it probably be necessary to switch to a higher tariff?
- How long do you want to be tied to a provider in terms of contract duration? How important is flexibility to you?
- How extensive will the project be? How many domains do you really need?
- How many visitors do you expect on your site? What is the minimum server performance required?
- Which security features are important to you? Do you have to fulfil country-specific requirements, for example?
- How much time can and do you want to invest in the maintenance of your WordPress site? What features should your hosting have to save time?
Overall, don’t focus too much on the price. With many hosters who lure you in with particularly favourable prices, you end up having to make compromises, for example in the form of high downtimes, slow loading times or suboptimal customer service.
Also make sure that you choose a hosting package that suits your needs – and is ideally tailored specifically to WordPress.
WordPress hosting management
With our Raidboxes dashboard, you get a seamless, intuitive interface that makes managing your WordPress sites easier, faster, and more efficient. Check it out!
Specialised WordPress hosts like Raidboxes offer clear advantages when it comes to performance, security and service. You may have to pay a few euros more, but at the same time you save a lot of time and benefit from a team of WordPress experts who are on hand almost around the clock to help and advise you.
Reading tips
If you want to read up on it in more depth and compare, we recommend our articles Finding WordPress hosting: 6 types of hosting compared and our WordPress hosting comparison.
Step 3: Install WordPress
Have you found your domain and hosting? The next step is to install WordPress. You can also do this manually, but almost all hosters now also offer an automatic 1-click installation for WordPress.
You want to switch to Raidboxes?
Talk to us! Together we’ll find the best solution for you and your company. Or test our WordPress hosting directly for several days free of charge!
Install WordPress with Raidboxes
With Raidboxes, you can easily start the WordPress installation by clicking on Create new box in your account and then entering a user name and password for your WP admin account. Another click on Create box then starts the installation in the background.

You can get started for free. You first create a demo box. All the information you enter in the first step can be changed later. To use the box (your WordPress website) to its full extent and, for example, register your own domain, you must then activate it and select a tariff.
You can then register your customised domain directly from your Raidboxes dashboard and link it to your box. You should also set up the included SSL certificate and switch your website to HTTPS. This can also be done in the settings of your Box (under SSL in the left-hand menu) at the touch of a button. If you need help with the individual steps, please contact our support team at any time.

Install WordPress manually
You can of course also install WordPress yourself. WordPress is uploaded to your server via FTP access. This takes a little more time, but is also possible with most hosters.
If you decide to set up WordPress manually, you should go through the following steps:
- Create MySQL database for the WordPress installation
- Set up FTP access (e.g. with FileZilla)
- Download WordPress on wordpress.org for free
- Prepare WordPress file (e.g. rename from wp-config-sample.php to wp-config.php and enter your own information such as database, user name, password, server address, etc.)
- Upload WordPress to your server via FTP
- Install WordPress (via 5-minute installation)
Raidboxes does the move for you
Is all this too complicated for you? Raidboxes will move your WordPress website for you within two working days – free of charge, securely and without obligation. If, on the other hand, you want to install WordPress manually, then see these instructions for moving to us.
Making important basic settings
Once you have successfully installed WordPress and logged in, it’s best to make a few basic settings before moving on to the next step in the website creation process.
You can find these in the WordPress menu on the left-hand side under Settings. There are three important basic settings:
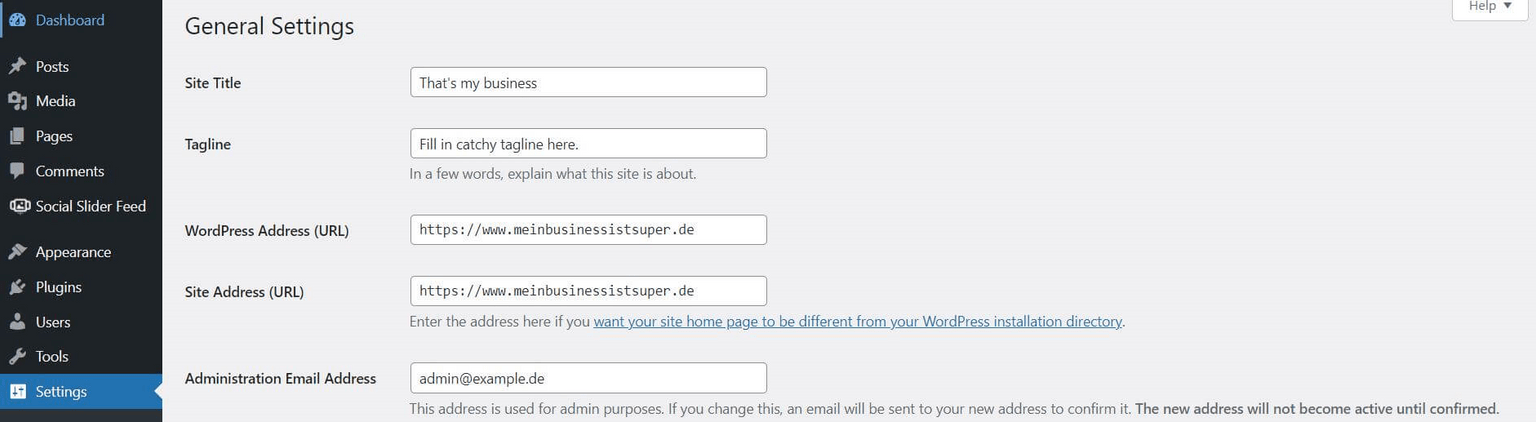
- General: Enter the title and subtitle of your website here and check whether your URL is set to https (not http). If not, you probably haven’t activated your SSL certificate yet.
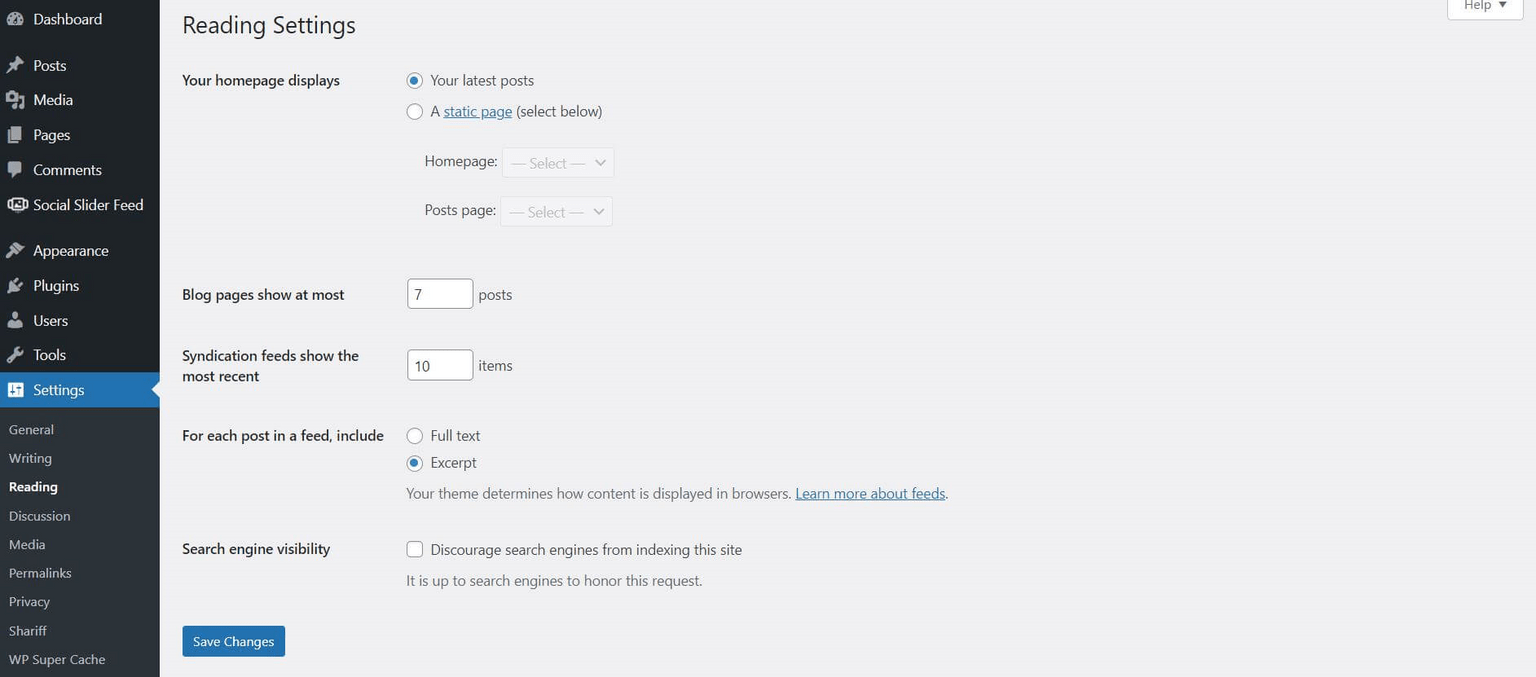
- Reading: The most important point in this area is visibility for search engines. The box should not be ticked here in the long term – otherwise your website cannot be found by Google & Co. However, as long as you are still working on your website, you can tick the box so that Google does not index your website while it is still under construction. Important: As soon as you have finished creating your website, you should uncheck the box.
- Permalinks: WordPress offers you the option of creating customised URL structures. We recommend the Post name setting. This is normally selected by WordPress by default, but you should check it again under Settings → Permalinks.
Step 4: Define structure and navigation
By installing WordPress, you have laid the foundation for your website. Before you start working on the design and content, you should now think about how you want to organise your website. This means you should work out a (rough) page structure and perhaps create the most important pages as placeholders (without content).
How your website is structured will of course vary. Depending on the type of website you want to create, the structure can look completely different. Blogs are structured differently to company websites or portfolios.
A simple structure for a company website could look like this, for example:
- Homepage
- Services (products, services)
- About us (e.g. company profile, team, jobs/career)
- Resources (e.g. news, guides, blog)
- Contact us
- Imprint
- Data protection
- GTC
How to create pages in WordPress and create a navigation
You can create a new page in WordPress by clicking on Pages → Create in the menu bar on the left. There, simply enter the page title (e.g. Home or Contact) and click on the Publish button at the top right.

Once all pages have been created in this way (for the time being), you should make sure that they can be found on your finished website. To do this, you need a navigation menu. You can create this in the WordPress menu under Design → Menus, whereby you can simply add the created pages to the menu via multiple selection. If you remove a page from the menu again, it is not completely deleted, but only disappears from the menu.

Best practice in web design is to create two navigation menus: The important pages (e.g. Start, Services, About us) usually belong in the top menu of your website (at the top of the page), legal mandatory pages (e.g. Imprint and Privacy) can also be placed less prominently in a footer menu (at the very bottom of the website).
It all depends on how you want to design your website in general, but also on which structure your WordPress theme is most likely to support in terms of design.
Step 5: Design WordPress website
Once all the pages have been created and your navigation menu has been set up, the fun part begins: the design of your website .
Here you can really let off steam creatively and give your site a look that suits you and your business perfectly.
WordPress offers countless design options, depending on how big your budget is and how good your programming skills are, for example. Listing them all here would go too far, so for this guide we will focus on two options that can also be easily combined with each other: Themes and Page Builder.
Design website with themes
Probably the easiest way to design your website is to use one of the many ready-made themes that WordPress offers. This is because every WordPress website needs such a theme as a basis anyway (more on this later).
Themes are templates with which you can influence the layout and design of your website (i.e. the display in the front end).

WordPress itself provides a number of designs. Under Design → Themes in the WordPress menu on the left, you have direct access to the complete database of wordpress.org – a good first port of call for finding new design templates and installing them directly. The themes listed there can also be filtered by their functions or colours, for example, or you can search directly for a specific theme. To get an impression of how the theme will look on your website, there is also always the option of displaying a preview.
In addition, there are countless other themes on the market from other providers such as Elegant Themes or Themeforest. These mainly provide so-called premium themes, which offer extended functions for little or (even more) money.
Find the right theme
Don’t know where to start looking for a theme? No problem! We’ve already summarized the 15 best WordPress themes of 2023 for you, along with the best free WordPress themes.
Once you have found a theme in WordPress that you like, you can add it directly to your website by clicking on Install. As soon as you have activated the theme, you will find the various settings it offers in terms of design under Design → Customiser . Most can be customised here:
- Website information (e.g. logo, website icon, favicon)
- Layout (e.g. container, header, footer, sidebars)
- Typography (e.g. fonts, font sizes)
- Colours (e.g. background colours)
- Menus (e.g. pages, posts, links)
- Widgets (e.g. slider, calendar, comments)
For minor changes to the design (e.g. buttons in a different colour), you can also add your own code under Additional CSS. However, you should only use your own code if you know what you are doing – and how to correct any errors that may occur if the intervention does not work as planned.
Pro Tip: Lightweight Theme
If you want to create a fast, stable and high-performance website, you should go for a lightweight theme and avoid multipurpose themes (e.g. Avada). Although these are quite affordable, they are often unnecessarily overloaded and slow due to the many features. Lightweight themes (e.g. Astra or Ocean) offer fewer functions, but are more flexible and perform better.
Use Page Builder for the design
You have even more freedom in the design of your WordPress website if you only design the absolute basics (header and footer of the page) via the settings of your theme and design everything in between freely according to your wishes with a so-called page builder such as Divi or Elementor.
The advantage? Page builder plugins such as Elementor offer you a system that allows you to customise your website almost without limits. They provide a wide variety of design elements, so-called widgets, for this purpose. You can then drag and drop these to the exact place on your pages where you like them best.
If you want to know more about how this works and which page builder is right for you, you should take a closer look at our magazine. There you will find, among other things, a complete guide for Elementor and other exciting articles on the topic, for example:
- A comparison of the 16 most popular WordPress page builders
- Page Builder: Curse or blessing for the WordPress world?
Step 6: Install plugins
If you have decided in favour of a page builder for the design, you have already entered the world of plugins in the previous step. There are also other plugins that can be useful for your WordPress website. What these are, of course, depends heavily on the way you build your site.
Overall, WordPress plugins are used to extend or modify the functions of WordPress. Most plugins are rather nice-to-haves that you don’t necessarily need. However, there are a few that are more or less mandatory if you want to get the most out of your website.
Some very well-known and good plugins that we can generally recommend are
- WPML (for multilingualism)
- Advanced Custom Fields (for advanced functions in editor mode)
- RankMath (for SEO)
- Gravity Forms (for forms, e.g. contact or newsletter)
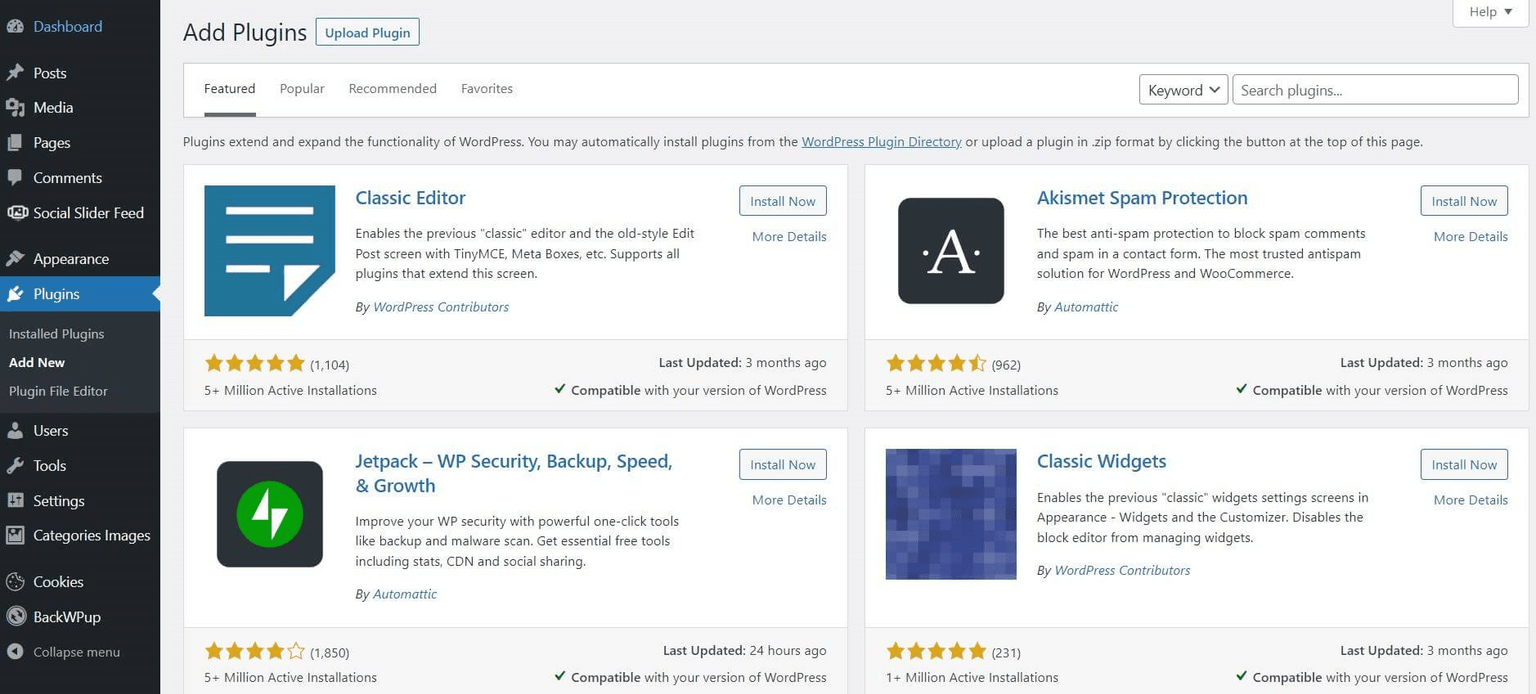
Plugins are installed in WordPress in a similar way to themes: Under the Plugins menu item in the left-hand sidebar of your WordPress backend, you will find your already installed plugins as well as access to the official database ( Install sub-item), where you can browse or search specifically for individual extensions.
You can find further recommendations for plugins on specific topics as well as comparisons in our magazine, for example in these articles:
- The 5 best WordPress plugins for image editing
- Yoast vs Rank Math: WordPress SEO plugins in comparison
- 8 popular WordPress slider plugins in comparison
- WordPress UX plugins: Improve the usability of your website
Step 7: Create pages and content
Once you’ve arrived here, you’re almost standing in front of your finished website. Basically, you now “only” have to breathe life into the framework you have built so far – with exciting, ideally search engine-optimised content.
How exactly you fill your predefined pages with content depends on the approach you have previously chosen for the design or structure of your WordPress website.
- If you rely entirely on a ready-made theme, in most cases there is a (customised) modular system that you can use to edit your pages. WordPress itself also provides a fairly flexible system as standard with the Gutenberg editor, which you can use to create content in different blocks (e.g. text, video, images) and arrange it on the page.
- If you have decided in favour of a page builder for the design, you are even freer in terms of content creation. In most cases, the content of your website can be created relatively flexibly and according to your personal taste.

Step 8: Add imprint, data protection & co.
Last but not least, as a website operator, you must not forget to properly implement the General Data Protection Regulation (GDPR). Of course, this section is in no way a substitute for legal advice. It is only intended to give you a brief overview and a feeling for what should formally be part of a legally compliant WordPress website.
Before publishing your website, be sure to have it checked by a suitable law firm specialising in online law or use services such as those offered by the IT law firm or getLaw.
In this checklist you will find the most important points that you should at least think about from a legal point of view:
- Your website needs an imprint that can be accessed from anywhere on your website.
- You must conclude a GDPR contract with your host.
- Your website must have a data protection page that is written in plain language and can also be clicked on from all pages and subpages.
- If you use cookies, these may only be set with the consent of the visitor. You need a cookie banner with the option to reject non-essential cookies.
- Your website should beencrypted using SSL.
- For contact forms or comment functions, there must be a GDPR checkbox for consent as a mandatory field.
- Google Fonts should definitely be integrated locally.
You can find more detailed information on the GDPR-compliant use of WordPress in our article GDPR & WordPress: Technical measures you should implement now.
WooCommerce Hosting
With WooCommerce hosting, you can launch your own online store quickly and securely and manage it professionally – without any technical hurdles. Check our Raidboxes WooCommerce Hosting now.
WordPress website created – then what?
After creation is before maintenance. Once your website has been populated and is online, there are a few administrative issues that you should take care of not just once, but on an ongoing basis. We would like to at least briefly touch on these here so that you are guaranteed not to forget anything:
- You should ensure the security of your WordPress website right from the start. Appropriate security plugins can help you with this. You should also make sure that your hosting provider provides comprehensive protection on the server side.
- Improving performance should also be a regular item on your to-do list. Here, too, you will gain a lot with WordPress hosting that is designed for fast loading times. You should also regularly clean up your WordPress database and keep your website as clean and lean as possible. See also our e-book Making WordPress faster.
- Without search engine optimisation (SEO), your website has virtually no chance of being found by interested readers. It is therefore best to keep up to date with what is important for top rankings on Google & Co. and adapt your content accordingly.
- It’s best to take care of WordPress maintenance on a monthly basis. The focus here is on updating WordPress Core and the active plugins.
Subscribe to the Raidboxes newsletter!
We share the latest WordPress insights, business tips, and more with you once a month.
Frequently asked questions
How much does a website with WordPress cost?
There’s no one-size-fits-all answer to how much a WordPress website costs. Among other things, the price depends heavily on the type of hosting you choose, which theme you select and which functions you want your site to have. Or whether you need to employ a WordPress agency or developer to take on individual tasks for you.
Can I create a WordPress website without programming knowledge?
Yes, it is possible to create a professional-looking website with WordPress even without programming knowledge. Themes or page builders offer intuitive and flexible options. However, depending on the size of the site, you may reach your limits at some point. Then you should consider getting support from experts and further developing your WordPress website individually.
What do you need for a WordPress website?
The basis for your own WordPress website is (1) a domain, (2) a suitable hosting provider on whose server you (3) install WordPress and operate your website.
Your questions about WordPress websites
Do you have questions about WordPress websites? Then please use the comment function. For more insights on WordPress, web design or online business, follow Raidboxes on Facebook or LinkedIn – or subscribe to our newsletter.
Leave a Reply